ユーザ用ツール
サイドバー
reactnative:style
以前のリビジョンの文書です
style
ReactNativeで簡単なfetchからFlatList→onPressまでのサンプルプログラム(CRNA)
React Nativeのデザイン - Stylesheet/Flexbox (part1)
React Nativeのデザイン - Stylesheet/Flexbox (part2)
flex
flex:1を親に追加すると、親は全体に広がります
子にもつけると、つけた数字の割合で親の中で広がります。
flexDirection
親に設定し、子の並ぶ方向を決める。
column(デフォルト):縦並び。
row:横並び。
flexWrap
親に設定し、子が画面に入りきらなかった場合の回り込みの設定をする。
nowrap(デフォルト):そのまま画面の外に伸びていく。
wrap:回り込ませる。
justifyContent
親に設定し、子の配置方法を設定する。flexDirectionに対する位置。
flex-start(デフォルト):子を先頭から配置。
flex-end:子を後ろから配置。
center:子を真ん中に配置。
space-between:子を先頭と最後に配置し、均等なスペースを他の子コンポーネントの間に挟む。
space-around:各子コンポーネントの均等なスペースを先頭の前、最後の後に加えた配置。
alignItems
親に設定し、子の横の広がり、もしくは位置を設定する。
stretch(デフォルト):伸ばして配置。
flex-start:子を先頭から配置。
flex-end:子を後ろに配置します。
center:子を真ん中に配置します。
alignSelfalignSelf:親の設定を子側で上書きする。alignItemsと同じ値が設定できる。
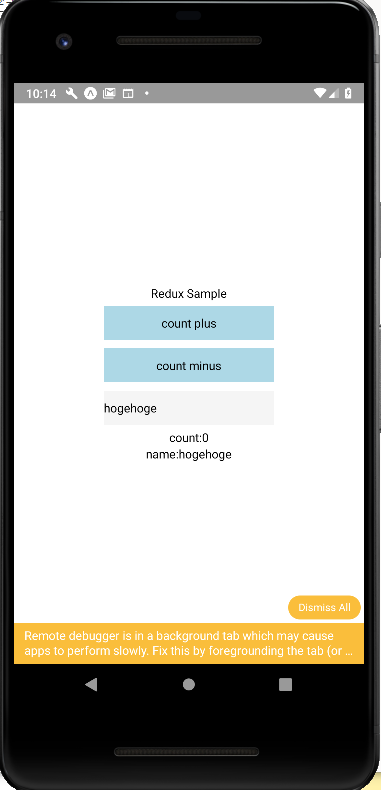
サンプル
import { StyleSheet, Text, View , TouchableOpacity ,Button ,TextInput} from 'react-native';

  render() {
    return (
      <View style={styles.view}>
        <Text>Redux Sample</Text>

        <TouchableOpacity style={styles.button} onPress={(e)=>this.pressPlus(e)} >
          <Text>count plus</Text>
        </TouchableOpacity>

        <TouchableOpacity style={styles.button} onPress={(e)=>this.pressMinuss(e)} >
          <Text>count minus</Text>
        </TouchableOpacity>

          <TextInput
            style={styles.input}
            onChangeText={(e)=>this.changeName(e)}>
          {this.state.name}
          </TextInput>

        <Text>count:{this.state.count}</Text>
        <Text>name:{this.state.name}</Text>
      </View>
    );
  }

const styles = StyleSheet.create({
  view:{
    flex: 1,
    alignItems: 'center',
    justifyContent: 'center',
    margin:10,
  },
  button: {
    width: 200,
    height: 40,
    margin: 5 ,
    backgroundColor: 'lightblue',
    justifyContent: 'center',
    alignItems: 'center',
  },
  input: {
    width: 200,
    height: 40,
    margin: 5 ,
    backgroundColor: '#f5f5f5',
    borderColor : 'black',
    justifyContent: 'center',
    alignItems: 'center',
  },
}
flex
reactnative/style.1549779141.txt.gz · 最終更新: 2019/02/10 15:12 by ips

