サイドバー
android:androidstudio2で始めるアプリ開発入門
目次
androidstudio2で始めるアプリ開発入門
第7回.Androidアプリの画面遷移 ~ アクティビティの起動をつかさどるIntentクラス
SimpleAdapter
        var list:MutableList<Map<String,String>> = mutableListOf()
        var map:Map<String,String> = mapOf("name" to "お味噌汁" ,"price" to "100")

        list.add(map)
        map= mapOf("name" to "お寿司","price" to "2000")
        list.add(map)
        map= mapOf("name" to "カレー","price" to "600")
        list.add(map)

        val from:Array<String> = arrayOf("name","price")
        val to:IntArray = intArrayOf(android.R.id.text1,android.R.id.text2 )
        val adpter:SimpleAdapter= SimpleAdapter(this  ,list,android.R.layout.simple_expandable_list_item_2,from,to)
        list1.adapter=adpter
アクティビティの起動とIntent
        list1.setOnItemClickListener { adapterView, view, i, l ->
            val item:Map<String,String> = adapterView.getItemAtPosition(i) as Map<String, String>
            var intent:Intent=Intent(this,ThanksActivity::class.java) //javaのクラスはこのようにかく
            intent.putExtra("menuName",item["name"])
            intent.putExtra("menuPrice",item["price"])
            startActivity(intent)
        }
↓
        val intent = getIntent()
        menu.text="あなたの注文は ${intent.getStringExtra("menuName")} で ${intent.getStringExtra("menuPrice")} 円です!"
intentの中身の確認
        val intent = getIntent()
        val ban:Bundle?=intent.extras
        for (k in ban?.keySet()!!){
            Log.d("TagName", "key=${k} val=${ban[k] as String}")
        }
第8回.Androidアプリのメニュー ~ オプションメニューとコンテキストメニュー
「戻る」メニュー
    override fun onCreate(savedInstanceState: Bundle?) {
        super.onCreate(savedInstanceState)

        //この1行追加
        supportActionBar?.setDisplayHomeAsUpEnabled(true)

    }

    override fun onOptionsItemSelected(item: MenuItem): Boolean {
        val id = item.itemId
        if(id == android.R.id.home) finish()
        return super.onOptionsItemSelected(item)
    }
第11回.Androidアプリでの非同期処理とWeb API連携
UIスレッド(mainスレッド)へのアクセス
E/AndroidRuntime: FATAL EXCEPTION: DefaultDispatcher-worker-1
    Process: com.nekotype.ips.api, PID: 22804
    android.view.ViewRootImpl$CalledFromWrongThreadException: Only the original thread that created a view hierarchy can touch its views.

 ↓
・・・
        GlobalScope.launch {

            val apidata = URL("http://weather.livedoor.com/forecast/webservice/json/v1?city=130010").readText()
            async(Dispatchers.Main) { //UIスレッドでコルーチンを実行する
                text.text=apidata
            }
・・・
HTTPアクセスのパーミッション
E/AndroidRuntime: FATAL EXCEPTION: DefaultDispatcher-worker-1
    Process: com.nekotype.ips.api, PID: 22981
    java.io.IOException: Cleartext HTTP traffic to weather.livedoor.com not permitted
step1:xmlフォルダを作り、network_security_config.xmlを作成する。
- res/xml/network_security_config.xml
<?xml version="1.0" encoding="utf-8"?>
<network-security-config>
    <domain-config cleartextTrafficPermitted="true">
        <domain includeSubdomains="true">livedoor.com</domain>
    </domain-config>
</network-security-config>
AndroidManifest.xmlに作成したnetwork_security_configへの参照を追加する。
- AndroidManifest.xml
<?xml version="1.0" encoding="utf-8"?>
<manifest xmlns:android="http://schemas.android.com/apk/res/android"
    package="com.nekotype.ips.api">

    <uses-permission android:name="android.permission.INTERNET"/>
    <uses-permission android:name="android.permission.ACCESS_NETWORK_STATE"/>

    <application
        android:allowBackup="true"
        android:icon="@mipmap/ic_launcher"
        android:label="@string/app_name"
        android:roundIcon="@mipmap/ic_launcher_round"
        android:supportsRtl="true"
        android:theme="@style/AppTheme"
        android:networkSecurityConfig="@xml/network_security_config"> //←ここ

        <activity android:name=".ResultActivity"></activity>
        <activity android:name=".MainActivity">
            <intent-filter>
                <action android:name="android.intent.action.MAIN" />

                <category android:name="android.intent.category.LAUNCHER" />
            </intent-filter>
        </activity>
    </application>

</manifest>
HTTPSの証明書エラー
E/AndroidRuntime: FATAL EXCEPTION: DefaultDispatcher-worker-1
    Process: com.nekotype.ips.api, PID: 23831
    javax.net.ssl.SSLPeerUnverifiedException: Hostname weather.livedoor.com not verified:
証明書エラーを無視するようにしてみたが、なぜか301が帰ってきてしまう。
<html>
<head><title>301 Moved Permanently</title></head>
<body bgcolor="white">
<center><h1>301 Moved Permanently</h1></center>
<hr><center>nginx</center>
</body>
</html>
一応やってみた2パターンの対応
証明証を無視するパターン1
    fun myTask(id:String){

        GlobalScope.launch {

            disableSSLCertificateChecking() //証明書の無効処理呼び出し

            val urlStr = "https://weather.livedoor.com/forecast/webservice/json/v1?city=${id}"
            //val urlStr = "https://chargen-api.herokuapp.com/"
            //val urlStr = "https://www.google.co.jp/"
            val url= URL(urlStr)
            val con=url.openConnection() as HttpsURLConnection

            con.requestMethod="GET"
            con.connect()

            val stream=con.getInputStream()
            val response=streamToString(stream)
            async(Dispatchers.Main) {
                text.text=response
            }
        }
    }


    private fun streamToString(stream: InputStream?): String {
        val reader=BufferedReader(InputStreamReader(stream,"UTF-8"))
        val sb=StringBuilder()
        val b = CharArray(10240)
        var line:Int
        val result = reader.read(b).let { sb.append(b,0,it) }
        return result.toString()
    }


    // 証明書の無効処理
    @Throws(Exception::class)
    fun disableSSLCertificateChecking() {
        println("[WARN] *** SSLCertificate Checking DISABLED ***")

        // ホスト名の検証を行わない
        val hv = HostnameVerifier { s, ses ->
            println("[WARN] *** HostnameVerifier DISABLED *** ")
            true
        }
        HttpsURLConnection.setDefaultHostnameVerifier(hv)
        // 証明書の検証を行わない
        val km: Array<KeyManager>? = null
        val tm = arrayOf<TrustManager>(object : X509TrustManager {
            @Throws(CertificateException::class)
            override fun checkClientTrusted(arg0: Array<X509Certificate>, arg1: String) {
            }

            @Throws(CertificateException::class)
            override fun checkServerTrusted(arg0: Array<X509Certificate>, arg1: String) {
            }

            override fun getAcceptedIssuers(): Array<X509Certificate>? {
                return null
            }
        })
        val sslcontext = SSLContext.getInstance("SSL")
        sslcontext.init(km, tm, SecureRandom())
        HttpsURLConnection.setDefaultSSLSocketFactory(sslcontext.socketFactory)
    }
証明書を無視するパターン2
色々試しているとそもそも動かなくなった…
            // ↓
            val tm = arrayOf<TrustManager>(object : X509TrustManager {
                override fun getAcceptedIssuers(): Array<X509Certificate>? {
                    return null
                }
                override fun checkClientTrusted(xc: Array<X509Certificate>, type: String) {}
                override fun checkServerTrusted(xc: Array<X509Certificate>, type: String) {}
            })
            val ctx = SSLContext.getInstance("SSL")
            ctx.init(null, tm, SecureRandom())
            // ↑

            val urlStr = "https://weather.livedoor.com/forecast/webservice/json/v1?city=${id}"

            val url= URL(urlStr)
            val con=url.openConnection() as HttpsURLConnection

            // ↓
            con.doOutput = true
            con.sslSocketFactory=ctx.socketFactory
            // ↑

            con.requestMethod="GET"
            con.connect()
BufferedReaderのread
        val reader=BufferedReader(InputStreamReader(stream,"UTF-8"))
        val sb=StringBuilder()
        val b = CharArray(10240)
        var line:Int

// javaの場合は下。これはそのまま流用できな。
//        while(0 <= {line = reader.read(b)}) {
//            sb.append(b, 0, line);
//        }

        val result = reader.read(b).let { sb.append(b,0,it) }
        return result.toString()
BufferedReaderが長すぎて読み込めない
read(b)をreadline()に修正
    private fun streamToString(stream: InputStream?): String {
        val reader=BufferedReader(InputStreamReader(stream,"UTF-8"))
        val sb=StringBuilder()
           var line:Int
        val result = reader.readLine().let { sb.append(it) }
        return result.toString()
    }
詳細が画面に収まらないためスクロールさせる
   <LinearLayout xmlns:android="http://schemas.android.com/apk/res/android"
        android:layout_width="match_parent"
        android:layout_height="match_parent"
        android:orientation="vertical">

        <TextView
            android:layout_width="match_parent"
            android:layout_height="wrap_content"
            android:layout_marginBottom="10dp"
            android:gravity="center"
            android:text="@string/tv_winfo_title"
            android:textSize="25sp"/>

        <LinearLayout
            android:layout_width="match_parent"
            android:layout_height="wrap_content"
            android:layout_marginBottom="10dp"
            android:orientation="horizontal">

            <TextView
                android:id="@+id/tvCityName"
                android:layout_width="wrap_content"
                android:layout_height="wrap_content"
                android:textSize="20sp"/>

            <TextView
                android:id="@+id/tvWeatherTelop"
                android:layout_width="0dp"
                android:layout_height="wrap_content"
                android:textSize="20sp"
                android:layout_weight="1"/>

        </LinearLayout>

<!--TextViewをScrollViewで囲む-->

        <ScrollView
        android:layout_width="match_parent"
        android:layout_height="match_parent">

        <TextView
            android:id="@+id/tvWeatherDesc"
            android:layout_width="match_parent"
            android:layout_height="wrap_content"
            android:layout_marginBottom="30dp"
            android:textSize="15sp"/>
        </ScrollView>
    </LinearLayout>
HTTPアクセスパターン1
            val urlStr = "http://weather.livedoor.com/forecast/webservice/json/v1?city=${id}"
            val url= URL(urlStr)
            val con=url.openConnection() as HttpURLConnection
            con.requestMethod="GET"
            con.connect()
HTTPアクセスパターン2
val apidata = URL("http://weather.livedoor.com/forecast/webservice/json/v1?city=${id}").readText()
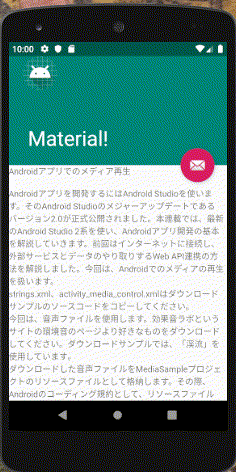
第12回.Androidアプリでのメディア再生
String リソースから文字列の取得方法
            btPlay.setText( R.string.bt_play_play)
            btPlay.text= getString( R.string.bt_play_play)
第13回.Androidアプリでのバックグラウンド処理と通知機能
android:exported 属性を含めて false に設定すると、サービスを自身のアプリでしか利用できないようにすることができます。これにより、他のアプリによるサービスの開始を効果的に回避でき、たとえ明示的インテントを使用したとしても開始できなくなります。
- AndroidManifest.xml
        <service
            android:name=".SoundManageService"
            android:enabled="true"
            android:exported="false"></service>
No Channel found for
Android O(APIバージョン26)以上ではNotifcationの使用には「通知チャネル」の登録が必要。
E/NotificationService: No Channel found for pkg=com.nekotype.ips.servicesample, channelId=null, id=1, tag=null, opPkg=com.nekotype.ips.servicesample, callingUid=10091, userId=0, incomingUserId=0, notificationUid=10091, notification=Notification(channel=null pri=0 contentView=null vibrate=null sound=null defaults=0x0 flags=0x0 color=0x00000000 vis=PRIVATE)
        _player.setOnCompletionListener {
            Log.d("service","setOnCompletionListener is called")

            val manager:NotificationManager=getSystemService(Context.NOTIFICATION_SERVICE) as NotificationManager

            if(Build.VERSION.SDK_INT >= Build.VERSION_CODES.O){

                val channel = NotificationChannel("channel_id_sample","プッシュ通知",NotificationManager.IMPORTANCE_DEFAULT)
                channel.apply {
                    enableLights(true) // 通知時にライトを有効にする
                    lightColor = Color.WHITE // 通知時のライトの色
                    lockscreenVisibility = Notification.VISIBILITY_PUBLIC //ロック画面での表示レベル
                }
                manager.createNotificationChannel(channel)
            }

            val builder=NotificationCompat.Builder(this)
            builder.apply {
                setSmallIcon(android.R.drawable.ic_dialog_info)
                setContentTitle("再生終了")
                setContentText("音声ファイルの再生が終了しました")
            }

            if(Build.VERSION.SDK_INT >= Build.VERSION_CODES.O){
                builder.setChannelId("channel_id_sample");
            }

            val notification = builder.build()
            manager.notify(1, notification)
            stopSelf()
        }

startForegroundService
Android Oreoでサービスを使ってみる
Foreground Serviceの基本
Android Oからのバックグラウンド・サービスの制限事項を実演する。
[Android]バックグラウンドでセンサーなどのログを取得し続けるには
Foreground(=前)Service(バックグラウンド)と思っていたので矛盾を感じていた。
しかし、Foregroundはユーザーが確認できること。
Serivceは画面がないことを意味する。
つまり画面はないが、ユーザーが確認できるのがForegroundService。
ユーザーは通知で動作を確認できるが画面がない。
設定ポイントは下記3点
- startForegroundService(intent)<呼出側>
- 5秒以内にstartForeground(1, notification)<呼ばれ側>
- <uses-permission android:name=“android.permission.FOREGROUND_SERVICE” /> 追加
下記エラーは3つ目のuses-permissionの追加で解消した。
2019-10-18 23:51:22.643 4837-4837/com.nekotype.ips.servicesample E/AndroidRuntime: FATAL EXCEPTION: main
    Process: com.nekotype.ips.servicesample, PID: 4837
    java.lang.SecurityException: Permission Denial: startForeground from pid=4837, uid=10091 requires android.permission.FOREGROUND_SERVICE
第14回.Android地図アプリとの連携とGPS機能の利用
Locationのパーミッション
<!-- GPSから取得 -->
<uses-permission android:name="android.permission.ACCESS_FINE_LOCATION" />

<!-- Networkから取得 -->
<uses-permission android:name="android.permission.ACCESS_COARSE_LOCATION" />
GPS:高精度な位置情報を取得できるが、電力消費が激しい。屋内では使えない。
Network:位置情報の精度は落ちるが、電力消費が少ない。屋内でも取得できる
Parameter 'xxxx' is never used

↓
    fun onMapShowCurrentButtonClick(@Suppress("UNUSED_PARAMETER")vieie: View){
        val uriStr="geo:${latitude},${longitude}"
        val uri=Uri.parse(uriStr)
        val intent = Intent(Intent.ACTION_VIEW,uri)
        startActivity(intent)
    }
ユーザー許可を取得する
    override fun onCreate(savedInstanceState: Bundle?) {
        super.onCreate(savedInstanceState)
        setContentView(R.layout.activity_main)

        val locationManager=getSystemService(Context.LOCATION_SERVICE)as LocationManager

        // 位置情報のユーザー許可を確認
        if (ActivityCompat.checkSelfPermission(this,Manifest.permission.ACCESS_FINE_LOCATION )
            != PackageManager.PERMISSION_GRANTED
        ) {
            // 許可がなければ許可を求める
            val permissions = arrayOf<String>(Manifest.permission.ACCESS_FINE_LOCATION)
            ActivityCompat.requestPermissions(this, permissions, 1000)
            // 求めた結果はonRequestPermissionsResult
            return
        }

        locationManager.requestLocationUpdates(LocationManager.GPS_PROVIDER,0L,0F,GPSLocationListener())

    }

    // パーミッション許可を求めた結果
    override fun onRequestPermissionsResult(
        requestCode: Int,
        permissions: Array<out String>,
        grantResults: IntArray
    ) {
        super.onRequestPermissionsResult(requestCode, permissions, grantResults)

        if (requestCode==1000 && grantResults[0]==PackageManager.PERMISSION_GRANTED){

            //パーミッションが許可された場合
            val locationManager = getSystemService(Context.LOCATION_SERVICE) as LocationManager
            val locationListener = GPSLocationListener()

            // パーミッション許可を求めた結果を確認しているので不要に思えるが、
            // ↓ locationManager.requestLocationUpdates を呼ぶ前にかならず必要なだけ
            if (ActivityCompat.checkSelfPermission(this,Manifest.permission.ACCESS_FINE_LOCATION) != PackageManager.PERMISSION_GRANTED){
                return
            }
            locationManager.requestLocationUpdates(LocationManager.GPS_PROVIDER,0L,0F,locationListener)

        }

    }
第16回.Androidのマテリアルデザイン ~マテリアルデザインとツールバー~
ツールバー
・・・
<!--        <android.support.v7.widget.Toolbar-->
        <android.widget.Toolbar
            android:id="@+id/toolbar"
            android:layout_width="match_parent"
            android:layout_height="?attr/actionBarSize"
            android:background="@color/colorPrimary"
            android:elevation="10dp"/>
・・・
第17回.Androidのマテリアルデザイン ~スクロール連動~
AndroidXを使用できるようにする。

<?xml version="1.0" encoding="utf-8"?>

<androidx.coordinatorlayout.widget.CoordinatorLayout
    android:layout_width="match_parent"
    android:layout_height="match_parent"
    xmlns:app="http://schemas.android.com/apk/res-auto" //app名前空間の読み込み
    xmlns:android="http://schemas.android.com/apk/res/android"> //andorid名前空間の読み込み


    <com.google.android.material.appbar.AppBarLayout
        android:id="@+id/app_bar"
        android:layout_width="match_parent"
        android:layout_height="wrap_content">

        <androidx.appcompat.widget.Toolbar
            android:layout_width="match_parent"
            android:layout_height="?attr/actionBarSize"
            app:layout_scrollFlags="scroll|enterAlways"
            android:background="@color/colorPrimary"
            android:id="@+id/toolbar"/>

    </com.google.android.material.appbar.AppBarLayout>

    <androidx.core.widget.NestedScrollView
        app:layout_behavior="@string/appbar_scrolling_view_behavior"
        android:layout_width="match_parent"
        android:layout_height="match_parent">

        <TextView
            android:layout_width="wrap_content"
            android:layout_height="wrap_content"
            android:text="@string/tv_article"/>

    </androidx.core.widget.NestedScrollView>


</androidx.coordinatorlayout.widget.CoordinatorLayout>
- build.gradle(Module.app)
AAPT: error: attribute layout_scrollFlags (aka com.nekotype.ips.toolbar2:layout_scrollFlags) not found.
 ↓
build.gradle(Modlue.app)に追加

implementation 'com.google.android.material:material:1.1.0-beta01'
enterAlwaysモードでスクロール連動させたい場合まとめ
- styles.xml
標準のアクションバーを非表示
<style name="AppTheme" parent="Theme.AppCompat.Light.DarkActionBar">
 ↓
<style name="AppTheme" parent="Theme.AppCompat.Light.NoActionBar">
- build.gradle(Module.app)
implementation 'com.google.android.material:material:1.1.0-beta01'
- activity_main.xml
<CoordinatorLayout>
    <AppBarLayout>
        <Toolbar />
    </AppBarLayout>
    <NestedScrollView>
        …
    </NestedScrollView>
</CoordinatorLayout>

<toolbar>に「app:layout_scrollFlags="scroll|enterAlways"」を記述
<nestedscrollview>に「app:layout_behavior="@string/appbar_scrolling_view_behavior"」
FloatingActionButton(FAB)
- activity_main.xml
<?xml version="1.0" encoding="utf-8"?>

<androidx.coordinatorlayout.widget.CoordinatorLayout
    android:layout_width="match_parent"
    android:layout_height="match_parent"
    xmlns:app="http://schemas.android.com/apk/res-auto"
    xmlns:android="http://schemas.android.com/apk/res/android">

    <com.google.android.material.floatingactionbutton.FloatingActionButton
        android:layout_width="wrap_content"
        android:layout_height="wrap_content"
        android:layout_margin="20dp"
        app:layout_anchor="@id/app_bar"
        app:layout_anchorGravity="bottom|end"
        app:srcCompat="@android:drawable/ic_dialog_email"/>

    <com.google.android.material.appbar.AppBarLayout
        android:id="@+id/app_bar"
        android:layout_width="match_parent"
        android:layout_height="180dp">

        <com.google.android.material.appbar.CollapsingToolbarLayout
        android:id="@+id/toolbarLayout"
        android:layout_width="match_parent"
        android:layout_height="match_parent"
        app:layout_scrollFlags="scroll|exitUntilCollapsed">


            <androidx.appcompat.widget.Toolbar
                android:layout_width="match_parent"
                android:layout_height="?attr/actionBarSize"
                app:layout_scrollFlags="scroll|enterAlways"
                android:background="@color/colorPrimary"
                app:layout_collapseMode="pin"
                android:id="@+id/toolbar"/>

        </com.google.android.material.appbar.CollapsingToolbarLayout>

    </com.google.android.material.appbar.AppBarLayout>

    <androidx.core.widget.NestedScrollView
        app:layout_behavior="@string/appbar_scrolling_view_behavior"
        android:layout_width="match_parent"
        android:layout_height="match_parent">

        <TextView
            android:layout_width="wrap_content"
            android:layout_height="wrap_content"
            android:text="@string/tv_article"/>

    </androidx.core.widget.NestedScrollView>


</androidx.coordinatorlayout.widget.CoordinatorLayout>
android/androidstudio2で始めるアプリ開発入門.txt · 最終更新: 2019/12/01 09:11 by ips